| GOBI Ranger Roof Rack |
| Overview - Installation - Testing - Conclusion | ||
| Overview | ||
|
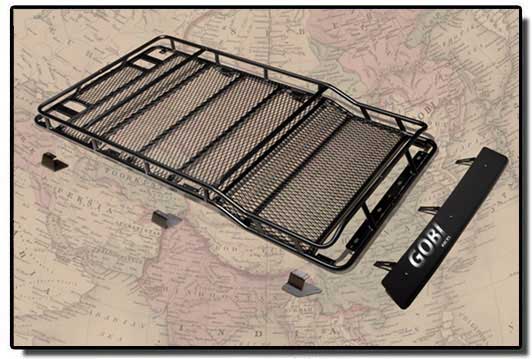
High Quality Utility Rack For the 2000-2004 Nissan Xterra * All the things the Nissan OEM rack is lacking are found in this rack. Easy installation combined with a
high quality replacement for your OE rack makes this a must have
for those of us that like to use our Xterra to the fullest extent..
For more information about this product
visit GOBI
Racks |
||
| Overview - Installation - Testing - Conclusion | ||
| Installation | ||
|
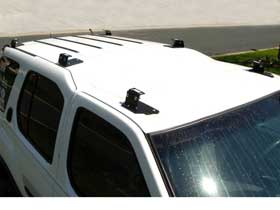
Removing the old rack is the most difficult part. |
||
|
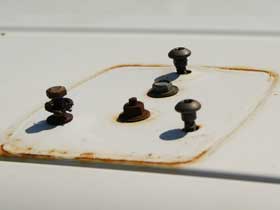
Gobi Ranger Rack There are three attachment points
on either side of your Xterra. The front and back ones are simple
enough to just remove and replace with the new hardware. However,
the middle one you will need to pay special attention to. |
|
|
|
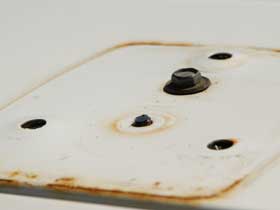
Just before I attached the middle rack hardware piece, I removed the second screw so that there is no interference with the bottom plate of the mounting bracket Once you do the little dance with the middle attachment points the front and rear attachment points are plug and play. |
|
|
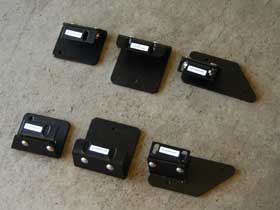
Here you see all of the mounts for the rack. Before you place the rack on the roof you attach these and tighten them down. Something to note about these footings is that there is vertical adjustment for the front and rear mounts which allows you a very nice fit. |
|
|
|
After you have all six of the mounts in place you will need a second set of hands to help you place the rack on your roof. From there you need to get ALL the bolts in place and nudge the rack to where you want it before you let loose the gorilla to tighten all the mounting bolts down. |
|
| Overview - Installation - Testing - Conclusion | ||
| Testing | ||
|
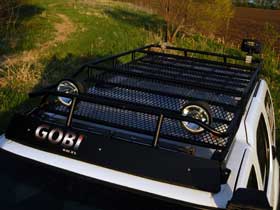
The measure of how useful a rack will be is how much it can hold and how functional can it be. One of the big plusses to this rack is the fact that is has a well supported floor from back to front. This will allow you to carry just about everything you need without fear of it falling through a crack and screwing up your roof. That combined with all the accessories (prewired for lights etc) make this a very useful addition to your Xterra
|
||
|
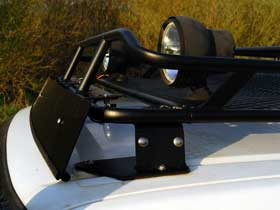
The mounting tabs that are located just above the fairing are designed for smaller lights in mind. I believe a 6" regular light would fit without any problem however if your light is very deep like mine you will not be able to mount them to the very front of the rack. However with the floor of the rack coming all the way to the front it allows for you to mount larger lights behind the tabs yet still offers them protection from the forward bars. NOTE: GOBI does offer an extension bracket to move the lights forward so that you don't lose any floor space. I will be trying them out to see how they work. |
|
|
|
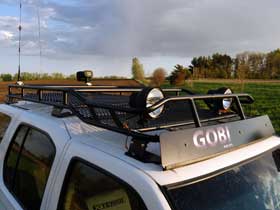
Here you can see how the fairing attaches as well as get a better look on how larger lights can be installed
|
|
|
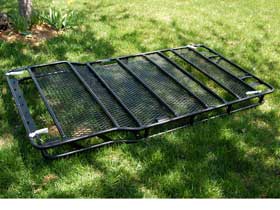
Here is just another view of the rack. From the bottom. If you look you can see four white things in the corners. Those are the wires that are preinstalled for your lighting. They come with wire clamps to attach to your existing wiring. Nice forward thinking.
|
|
|
|
In the future I will be adding more of the GOBI accessories and will update this so you can see how they work with the rack. One item that interests me is the ladder. For those of us that have lifted our trucks getting to the roof can be a chore. Another very useful accessory is
the highlift Jack mount. It is always challenging to find a safe
and secure place to put it. As soon as I get these I will add more info here. Check back soon!! |
|
| Overview - Installation - Testing - Conclusion | ||
| Conclusion | ||
|
With the one piece construction and the heavy duty powdercoating this rack will last the life of the truck and beyond. Living in the northern parts of the US rust is a constant problem. I do not see it being a problem with this product. That combined with the options make this a rack that will suit all my needs for the life of the truck. The only thing limiting this rack is the weight capacity of the roof. Having used other aftermarket roof and rack systems I can say that this rack has all the things on it that I want/need save one thing, a good place to mount a ham radio antenna. The holes that are in the rear of the rack are perfect for reverse lights but too small for the antenna. It does cost more than other alternatives but you get what you pay for. That said you will not find a better built rack on the market.
|
||
| Review by xoc May19, 2008 | ||