| CALMINI Solid Axle Swap Kit |
| Overview - Installation - Testing - Conclusion | |
| Overview | |
|
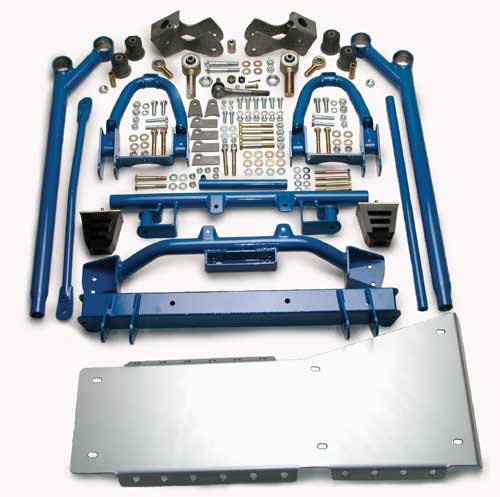
The stock front suspension on the Xterra is called an independent front suspension. This means that the differential is at a fixed location on the frame and the two wheels move independently of each other from that fixed point. While this is nice for city driving it can cause problems by way of losing contact with the ground in off-road situations. As it sits an Xterra does not have much articulation and your ground clearance will change due to compression of the front end. CALMINI's SAS (Solid Axle Swap) system for the Xterra solves these problems in a simpl, user friendly kit. As designed there is no welding to the Xterra. The only welding that must be done it to the axle. As such this kit can be done at home with basic tools. Start to finish times for the kit is about 25 - 30 man hours. And when done you will have a vehicle with articulation to spare that gives you a ride that is actually better than stock both on and off road. The CALMINI SAS Kit includes:
NOT INCLUDED IN THE KIT
DISCLAIMER: This kit should be installed by someone with moderate knowledge on how to work on a vehicle with all the tools needed. This is not something that a person who only changes their oil should even attempt. If you are not sure you can do this yourself and you do not have people to help you, you would be better off letting a shop do the work. For more information about this product visit CALMINI |
|
 |
|
| Installation | |
|
NOTE: The instructions for installation are strait forward and intuitive. Most critical however is the welding of the axle brackets. If they are welded on at that improper angle you will have driveline and caster issues that will require the mounts to be removed and re-attached. Measure twice weld once. The information below is a general guild and if you have any specific questions please fell free to e-mail me.
|
|
|
I was given one week to install this kit before driving 1200 miles one way to Moab for the 2005 goneMOAB event and as such I did not have time to screw around. The axle mounts I had welded at a local shop. The rest of the kit I did myself in my driveway. Total time from start to finish was about 25 man hours. Tools I used
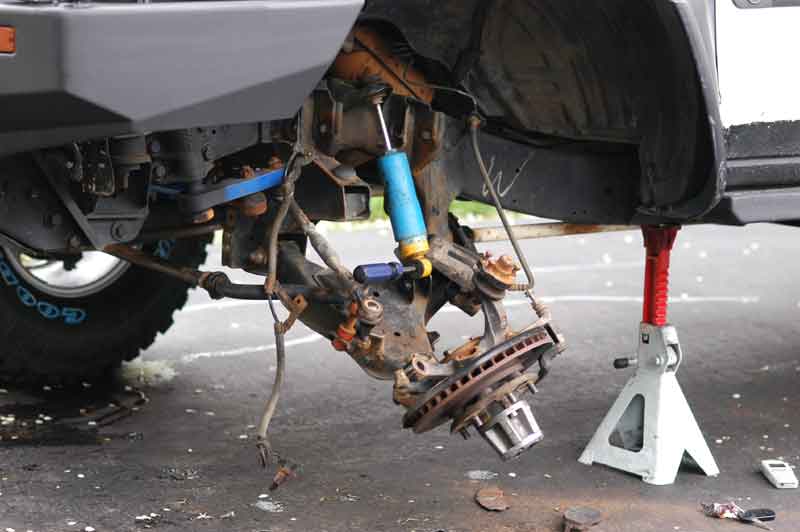
Step one : Remove the old junk. This includes upper and lower control arms (lower control arm mounts), torsion bars, front differential, front driveshaft, brakes, cross members ( leave the transmission cross member till you are ready to swap it, then support the transmission for the switch), frame side shock mounts and the steering linkages. Of all the things to remove the lower control arm mounts will give you the most trouble. I removed mine by way of the saw and grinder. If you have access to someone with a cutting torch it goes MUCH faster. Something of note. Be careful when you are removing the shock mounts as it is a tight space. I was able to remove most of the mount with the saw then the rest of the mount by careful use of the cut off wheel. Everything else goes rather quickly.
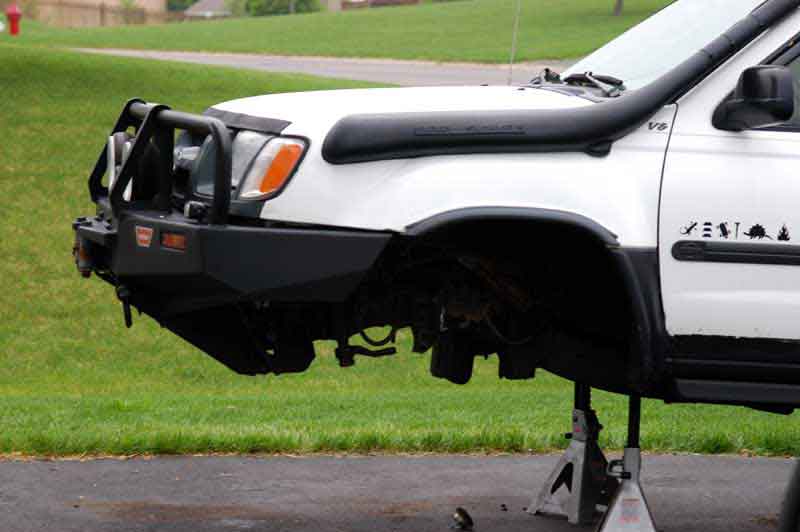
After all the crap is off the frame you should spend some time to clean up the frame so that is looks nice. This means grinding any rough spots and making things look like the IFS crap was never there. When you are done the front end will look like this (there are also some good pics in the instructions for close up stuff)
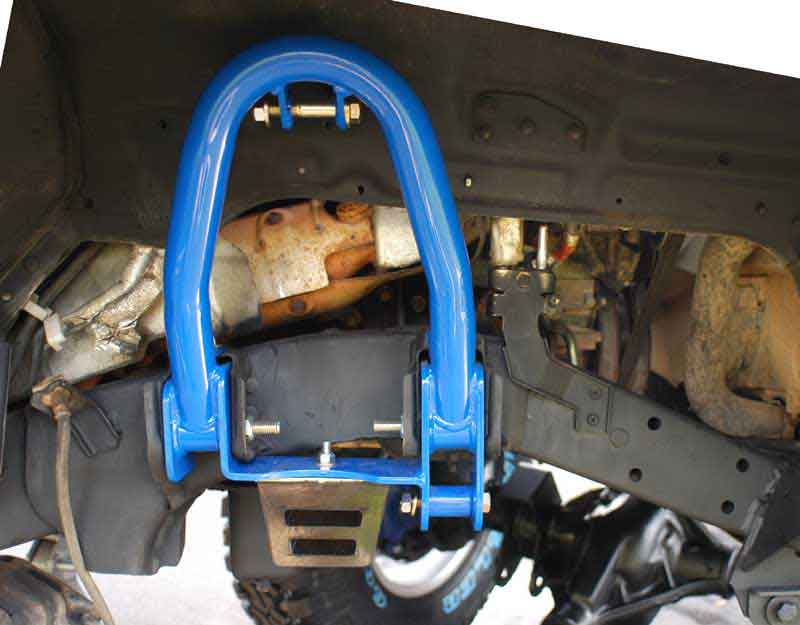
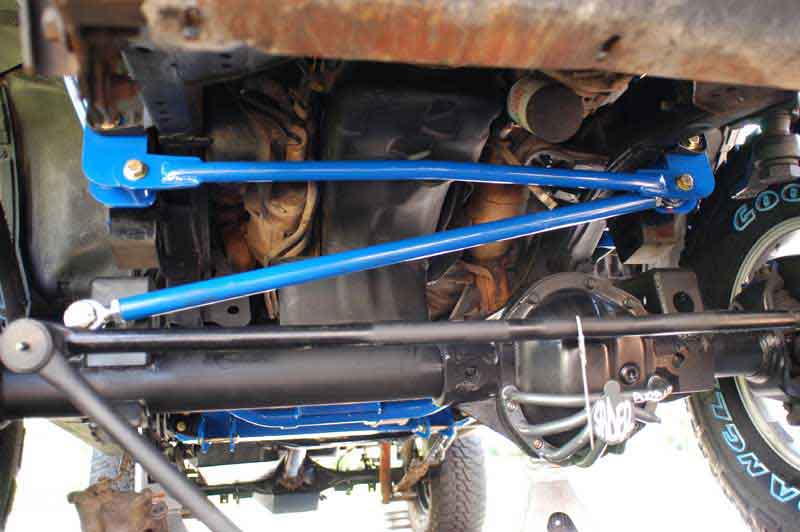
Step two: Start putting on the kit Again the instruction are good, but to be honest I looked at them once and never looked back. The bolts and parts that are supplied are rather self explanitory as to where they go and how they fit. I started by putting on the shock hoops. As with all the other pieces in the kit there is little tolerance for error. Either the part will fit or it will not. Do not force it. If you find that a part is not going in smoothly go back and check that all the old crap is out of the way (this really only applies to the shock hoops)
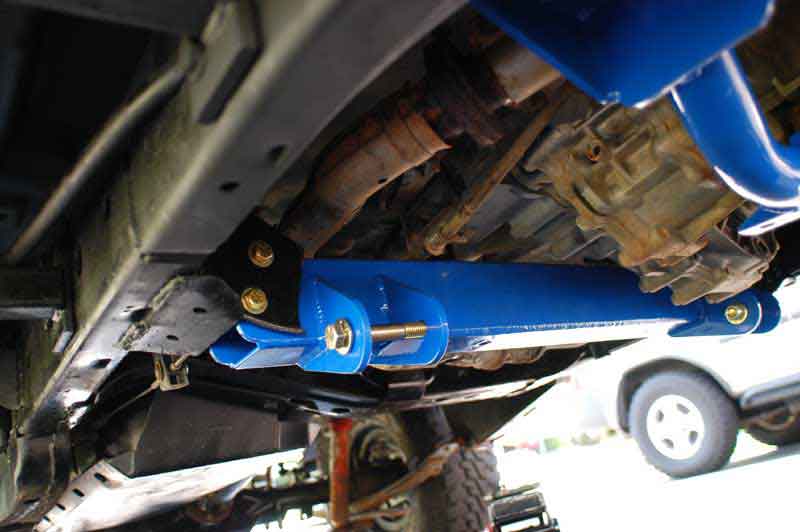
Once the hoops are in place the rest of the front sort of falls into place. You will put in the new cross members. NOTE: Remember to support your transmission when you replace that crossmember with the new one.
Then attach the long arms and move your axle into place (I had the wheels and tires on my axle to help move it around)
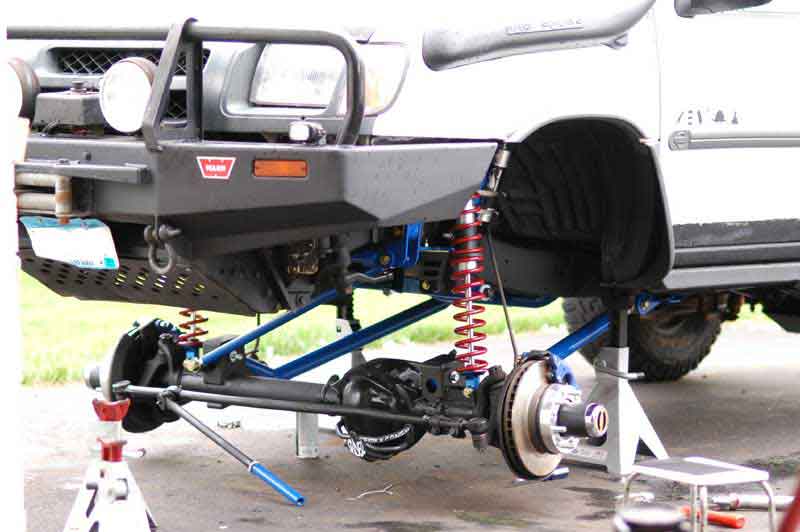
After you get the axle under the truck and have attached the long arms you can attach the coil overs (follow instructions provided with the coilovers so that they are set up properly) and install the front drive shaft.
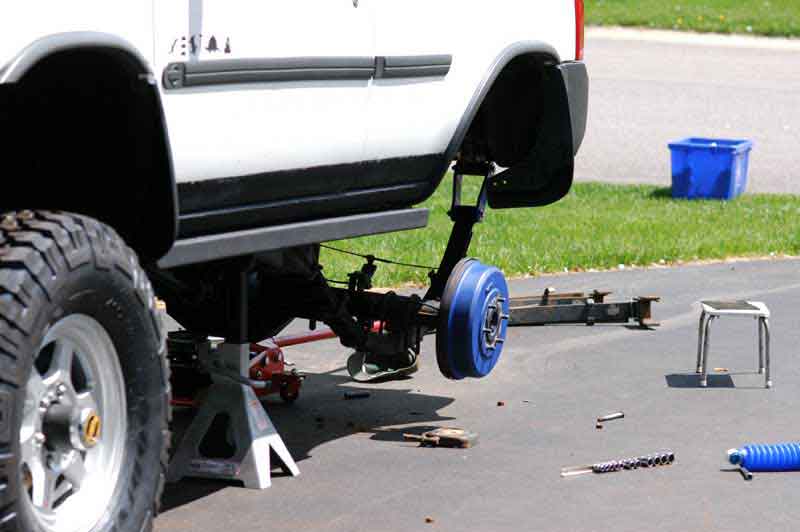
At this point you are just about done with the front. You will still need to attach the steering, bleed the brakes and adjust your ride height and set your toe. On to the back half of the vehicle. Calmini sells a replacement rear spring pack that is tuned for the lift of the front end. To save yourself the trouble of doing all the crap necessary to get a rear spring made it would be prudent to get the springs from them. Same goes with the front coil-overs and other "options".
Once you have the rear springs replaced.and you have double checked to make sure everything is tight then it is time to drive it around.
|
|
| Testing | |
|
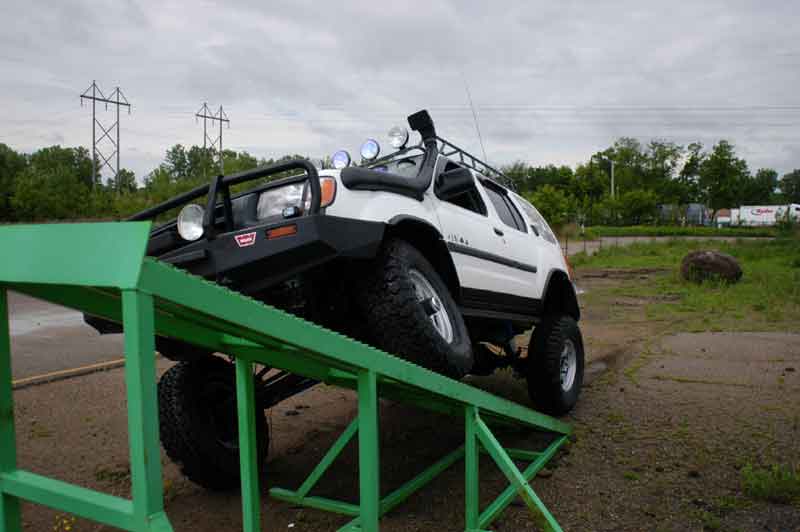
For me the test was not only the week I spent in Moab but the 2400 miles round trip of highway driving I did. Go HERE to see pics from the event and see how well it performed. More pics as I take it to more places. Follow up info: Two years after install the kit is still working well. My only complaints have been the powdercoat. It is not holding up well and flakes off.
|
|
|
For the wheeler that is looking to advance farther into the sport this kit is for you. It takes out all the guess work and is a satisfying project if you do it yourself. IF YOU WANT IT TO KEEP LOOKING GOOD I WOULD SUGGEST EITHER LIVING IN THE DESERT OR HAVING THE CRAP POWDERCOAT STRIPPED AND PAINT IT YOURSELF. This kit can be put on by one person and is about as easy as it comes for a SAS conversion. All the parts are way overbuilt and you will break your truck before you break any of the parts of this kit. The axle that it uses can be found in most junk yards and for this kit is the biggest variable to cost depending on how you build up the axle and if you do it yourself. .Please e-mail me if you have any specific questions @ carlton.mcmillan@charter.net |
|